Open your private gallery
Use the profile icon in the top bar to view your role, name, email and optional contact number. You can update your contact details there. To change your sign-in email, verify the new address using the code sent to it. Sign out stays beside the profile icon.
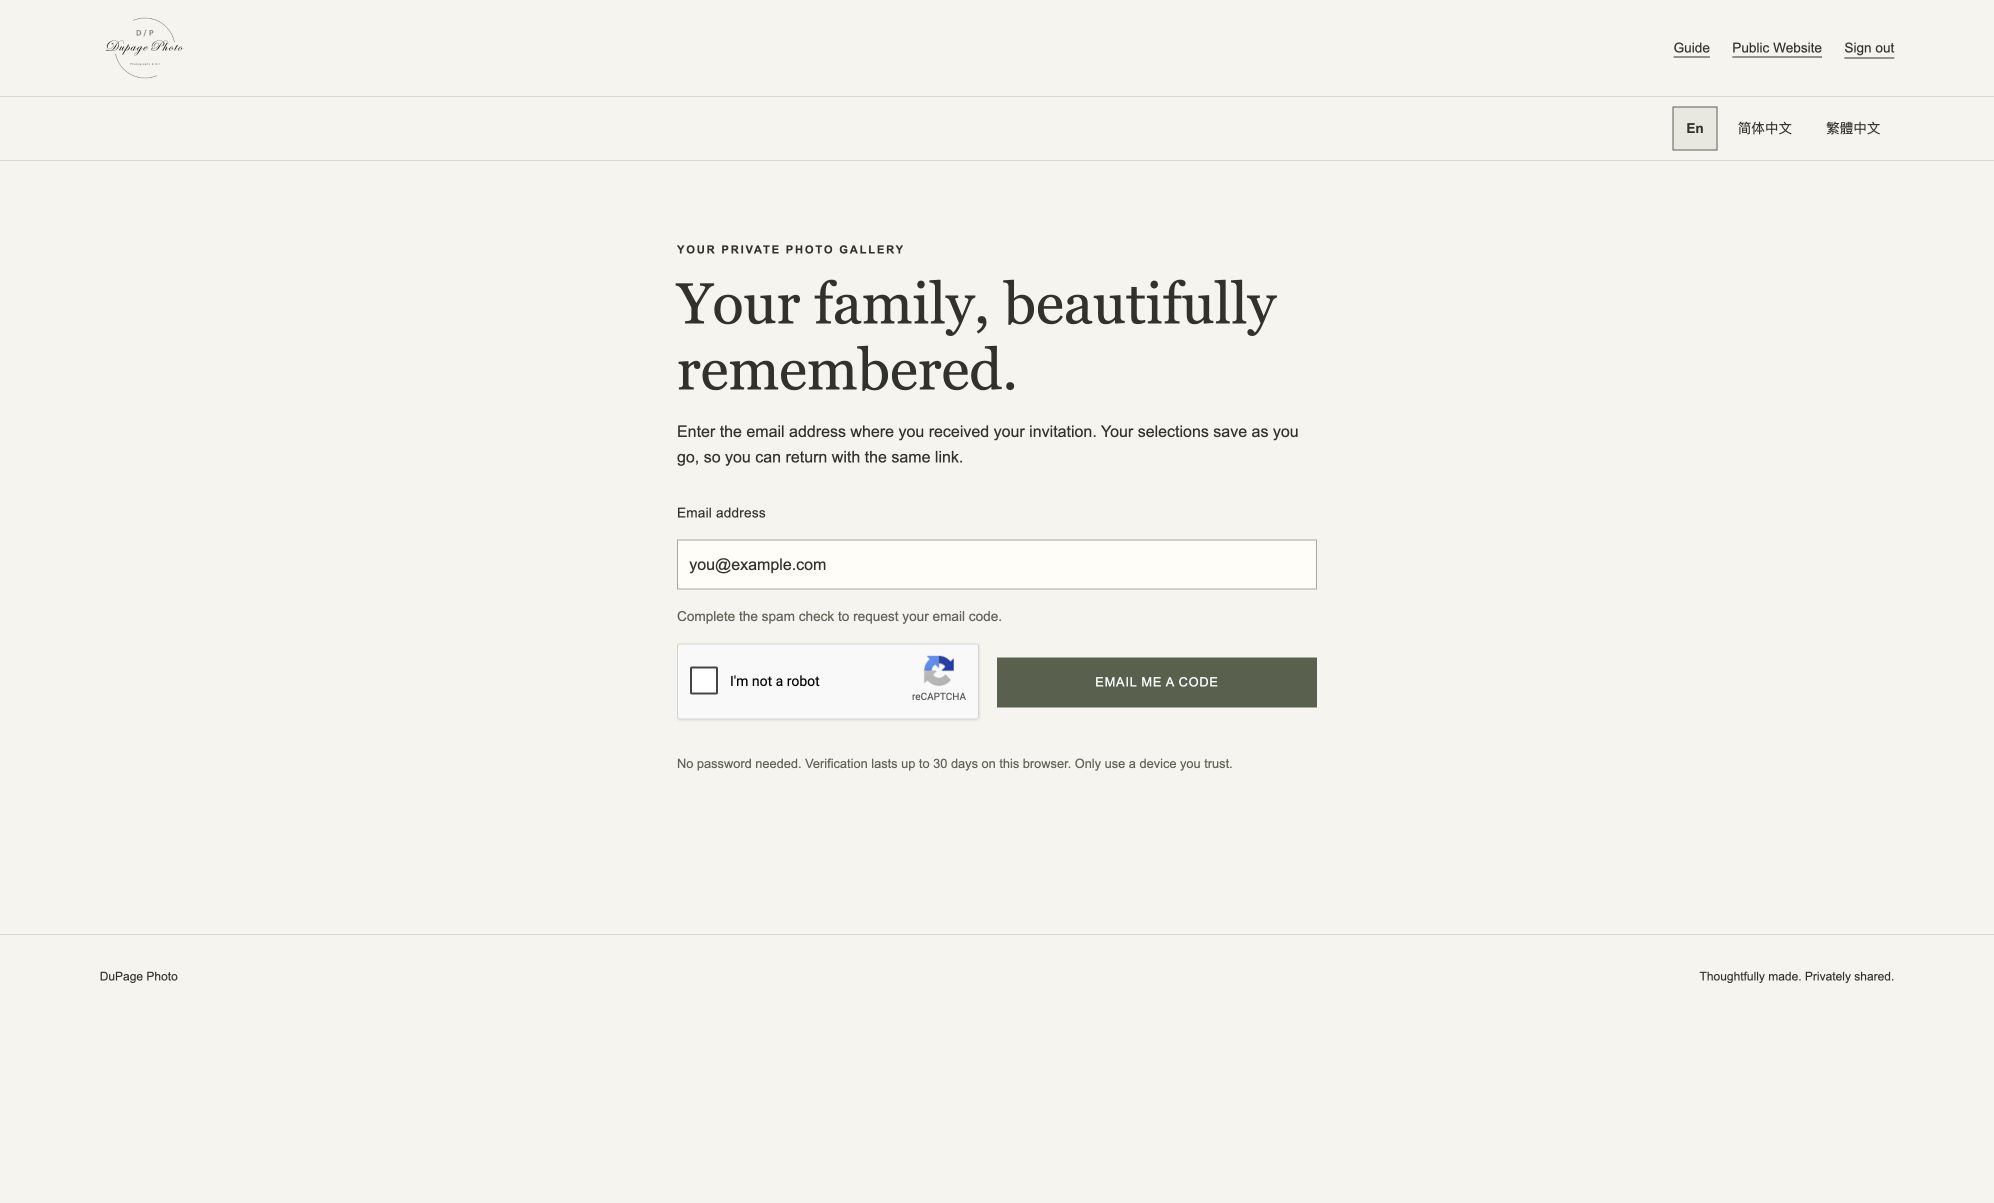
- Follow the gallery link in the invitation from DuPage Photo.
- Enter the email address where you received that invitation, complete the reCAPTCHA spam check, then choose Email me a code.
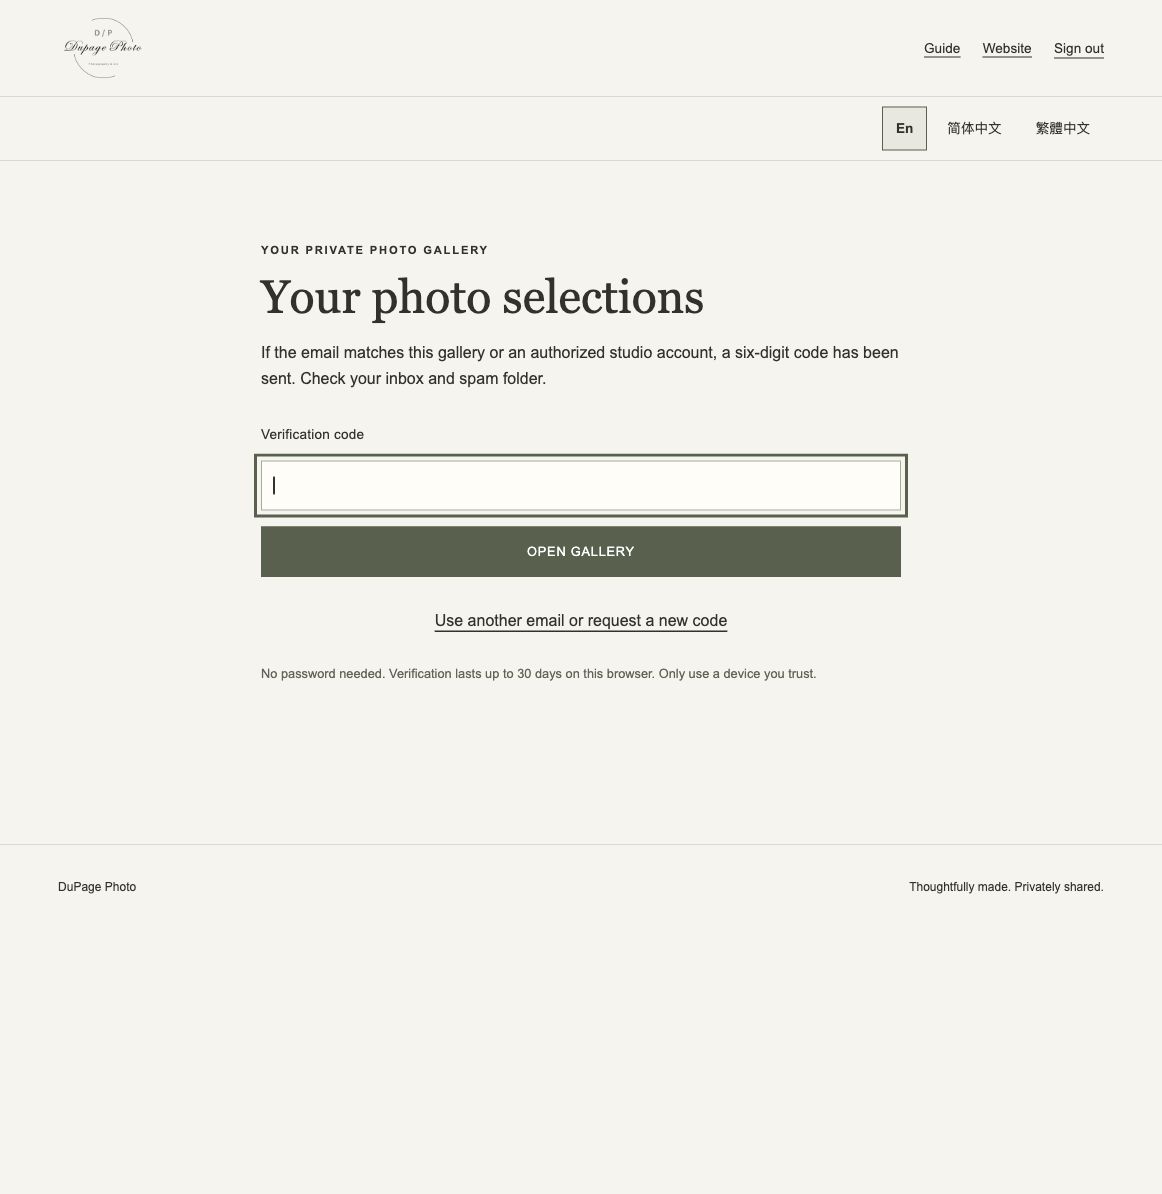
- Enter the six-digit code from your inbox. Check your spam folder if needed.
No password or Google account is needed. Your code lasts 10 minutes and can be used once. Keep your gallery link and verification code private.
On a phone, photos start in 1 column for easier reviewing. Tap or slide the round 1 / 2 switch in the floating bar to choose one or two columns. Your choice is remembered on this browser.
Tap or click a photo to see it larger. Use Previous photo and Next photo to move through the gallery, then Close to return to the grid. On a computer, the left and right arrow keys also work when you are not typing in a field.
At the first or last photo, a message shows where you are. Use Go to last photo or Back to first photo to cycle through the current view. The arrow buttons and keyboard arrow keys also wrap around. If only one photo matches your filters, there is no other photo to navigate to.
If you cannot receive your email code, ask Scarlette for a backup code. Choose Use a backup code from Scarlette on the sign-in page, enter your gallery email and the full code, and complete the spam check. Each backup code works once across your client galleries. You can resume saved selections as usual; your verified browser can stay signed in for up to 30 days.
Choose one level for each photo
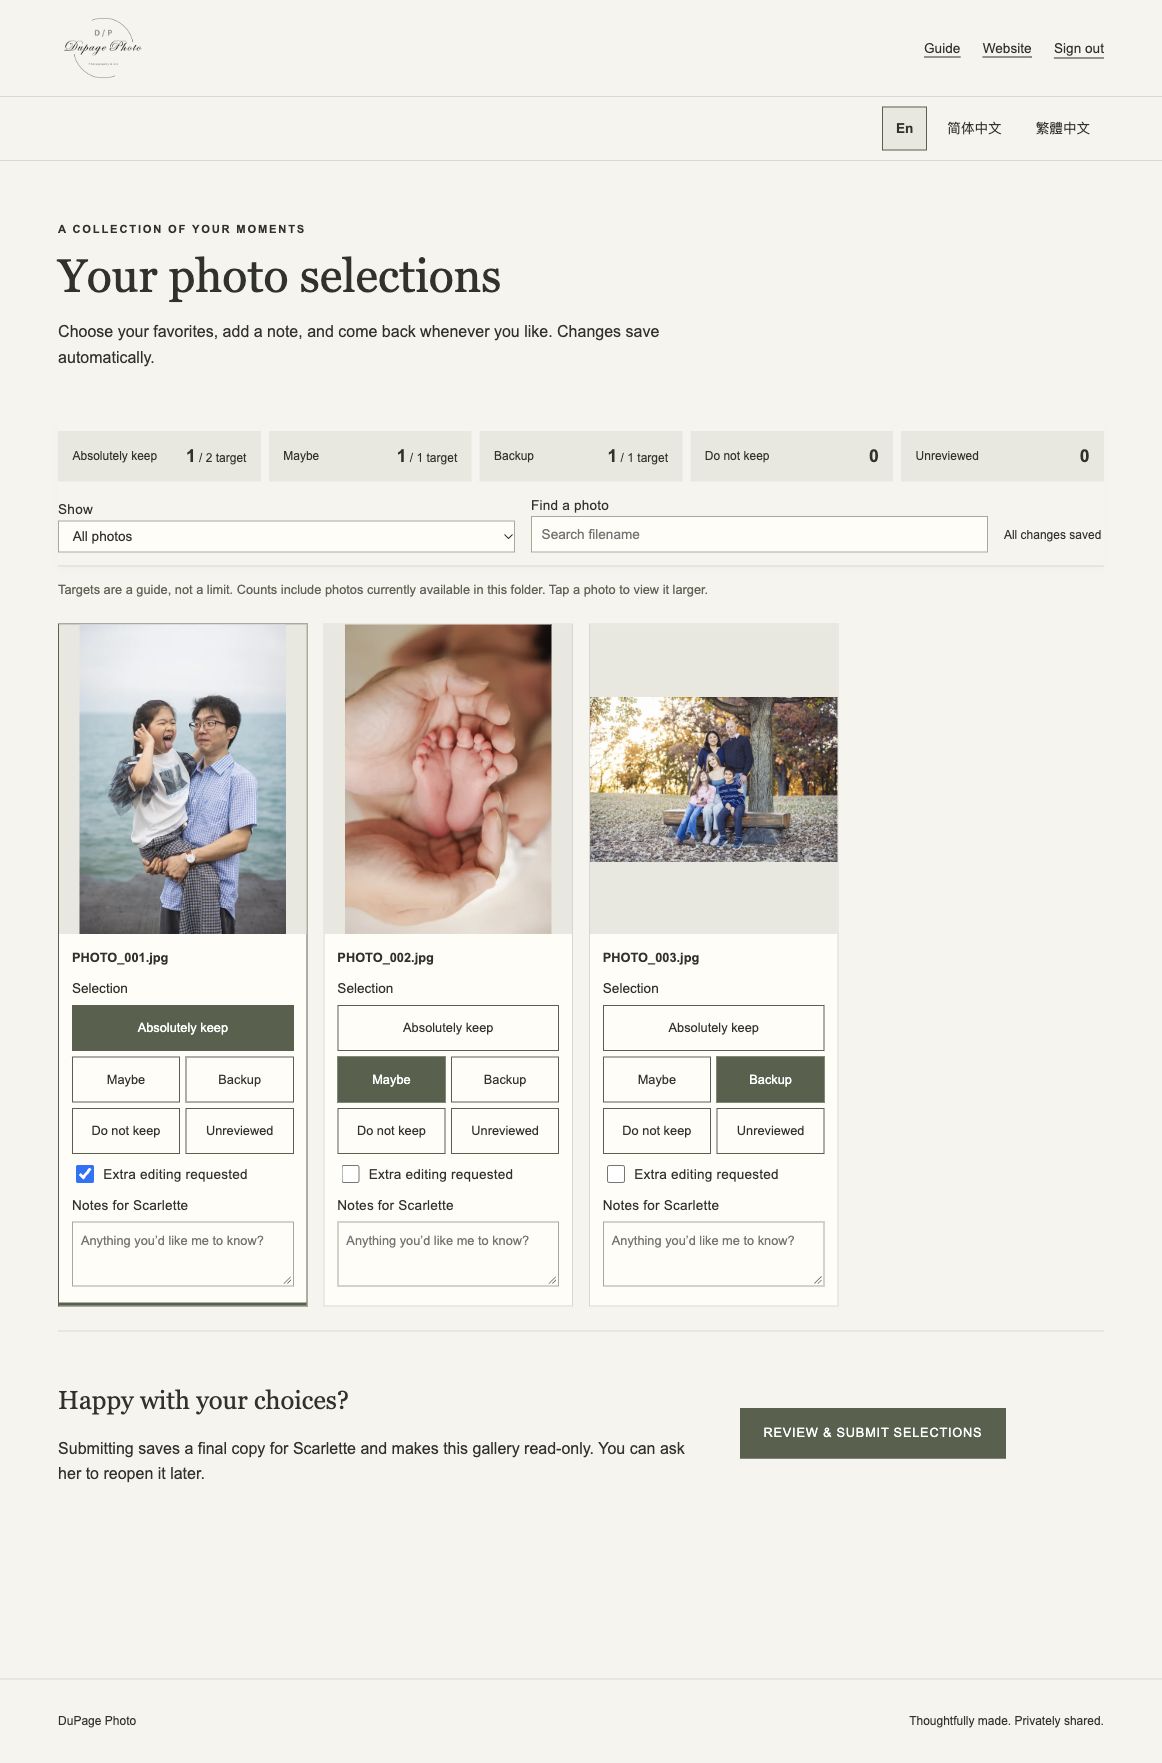
The gallery buttons use numbers in one row: 3 = Absolutely keep, 2 = Maybe, 1 = Backup, 0 = Do not keep, and -1 = Unreviewed. The bottom selection stats show this legend beside the live counts. Enlarged photos show full button descriptions on desktop and numeric buttons on phones.
Tap or click a Selection button beneath a photo or in the larger viewer. The active level is highlighted. All levels are shown directly, so you do not need to open a menu. You can change your mind as often as you like before submitting.
| Level | Use it for… |
|---|---|
| Absolutely keep | Your definite favorites. |
| Maybe | Photos you like but are still deciding about. |
| Backup | Alternatives to keep in consideration. |
| Do not keep | Photos you do not want in your selection. This does not delete the original. |
| Unreviewed | Photos you have not decided on yet, or want to reset for another look. |
Each photo has one selection level at a time. Choosing a new level replaces the old one. Choose Unreviewed to clear the current level and come back to it later.
Photo checkboxes are available as soon as you open an editable gallery. Check two or more photos to show bulk selection levels automatically in the top bar, then choose a level. Your notes and editing requests stay unchanged. Use Shift-click for a range, Ctrl/Cmd-click to toggle photos, or drag across photos on desktop. Choose a category count in the bottom bar to show that category, or Total to show all photos. Clear selection clears the checkboxes; applied levels remain saved. Live selection totals stay in a separate bar at the bottom.
Swipe left or right on an enlarged photo to move to the next or previous photo. You can also tap or click the left half for the previous photo or the right half for the next photo. The arrows overlay the photo. Vertical scrolling and pinch zoom remain available.
In the enlarged photo view, selection buttons and the notes box are shown immediately. Live totals and category filters stay visible at the bottom. Changes save automatically while the gallery is open for editing. Submitted selections are read-only; the buttons and notes remain visible but disabled.
Request editing and add a note
Check Extra editing requested if you want to flag a photo for additional attention. This is separate from its selection level, so remember to choose that too.
Use Notes for Scarlette for anything specific about that photo—for example, “Please remove the small mark on the blanket.” Notes save with the photo, so you do not have to write down filenames or send a separate list.
Use Previous, Next or the page selector in the floating selection bar. Each page shows up to 50 photos in complete rows. Counts cover the whole gallery. Collapse gallery hides the photos and filters so you can reach other sections; Show gallery returns to the same page. Your selections and photo notes are kept when you change pages or collapse the gallery.
Gallery notes & replies
Use Gallery notes & replies for a request about all selected photos, a question, or a reply to your photographer. Write your message and choose Post note. Choose Reply beside a message to quote it. Posted notes are saved and shared; text still in the input box has not been posted.
You can post notes before or after submitting your selections. Your photographer can reply here, and messages refresh automatically. For a request about one photo, use that photo's note instead.
Your photographer’s new notes and replies send you an email notification with a link to the private conversation.
Payment records
Expand Payment records in your gallery to see the agreed session total, suggested deposit, recorded payments and remaining balance. The dated list shows received and voided entries. Only your photographer can change these records; leave a gallery note if you have a question.
If your photographer sets a selection deadline, it appears at the top of your gallery. Dates use Chicago time. Optional reminder emails arrive 3, 2 and 1 days before the deadline until you submit. Ask your photographer if you need more time.
Keep track of your choices
The summary shows how many photos you have placed in each level. If Scarlette set a target, you will see your count beside it, such as 8 / 10 target. Targets are guides; the gallery lets you submit above or below them.
Tap a category count in the bottom bar to filter the gallery. The active category is dark green. Tap Total to show all photos. Counts and targets always cover the whole gallery. Filtering only changes what you see; it does not change your choices.
Save your progress and return later
Selections, editing requests and notes save automatically. After making changes, wait until the status says All changes saved before closing the page.
You can close your browser and reopen the same emailed link to continue. Your verified browser can stay signed in for up to 30 days. A new device, cleared cookies or an expired session will ask for another email code; your saved selections will still be there while the gallery remains available.
If you lose your connection or see a save error, keep the page open. Unsaved notes remain in that window, but closing it can lose them. Copy any unsaved text before reloading, then check that your choices are saved.
All browsers using this gallery work on the same selection list. If another window has changed a photo, you may be asked to reload before editing it again.
Send your final selections
- Review your favorites, notes and editing requests. Check any remaining Unreviewed photos.
- Wait for All changes saved.
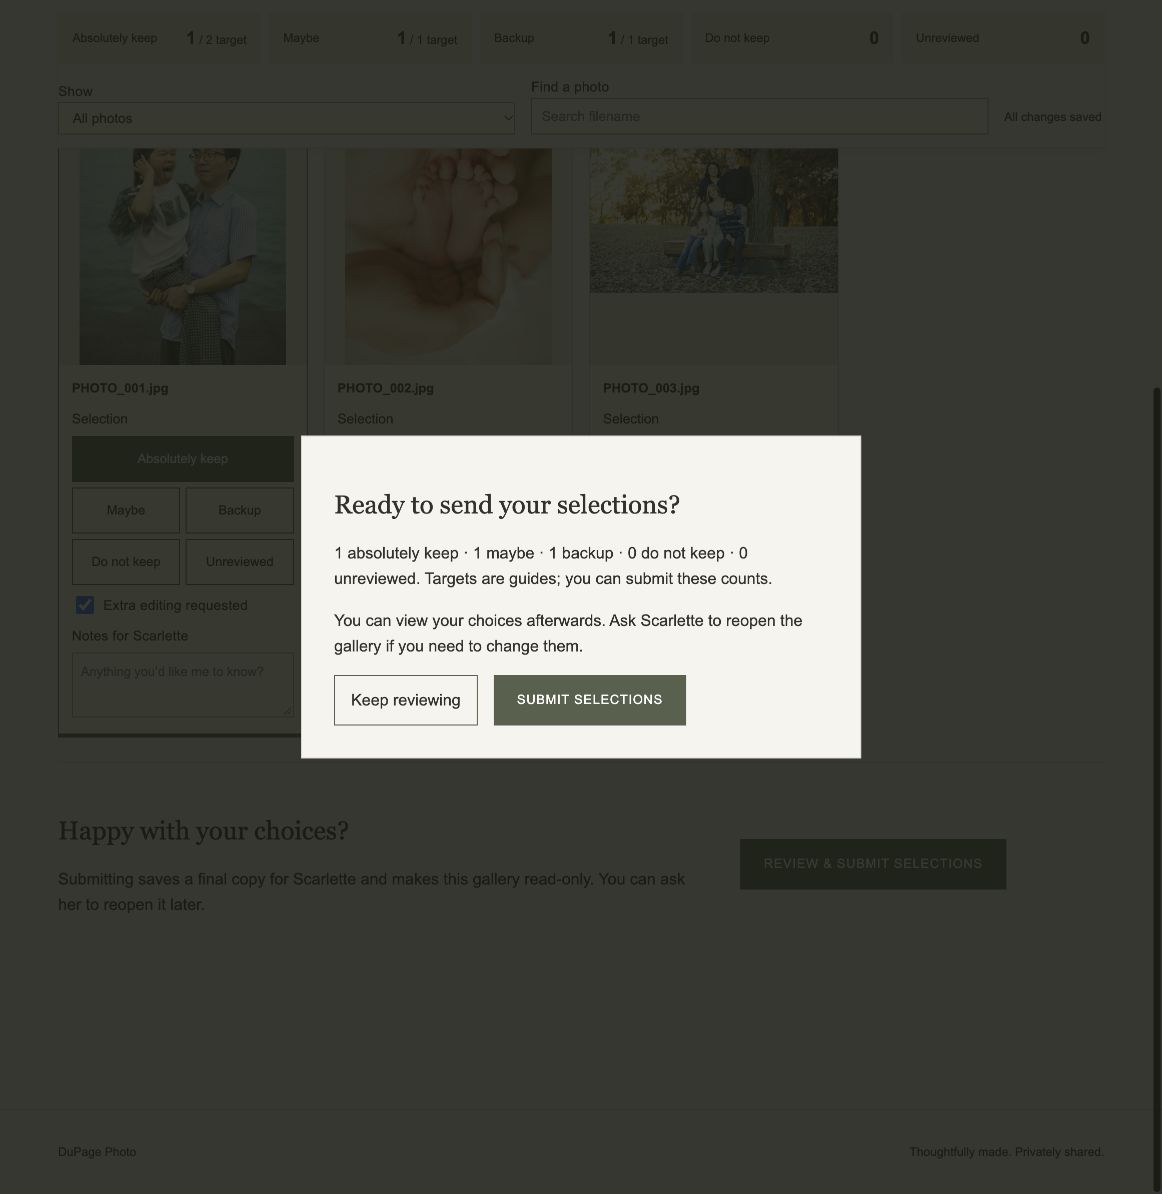
- Choose Review & submit selections.
- Check the count for each level in the confirmation, then choose Submit selections.
Your submission is saved for Scarlette and the gallery becomes read-only. You can return to view your choices. If you need to change something afterwards, ask Scarlette to reopen the gallery; your previous submission is retained.
A little help, if you need it
- My code has not arrived or has expired.
- Use the same email that received your invitation and check spam. Codes last 10 minutes and allow five attempts. Use Use another email or request a new code to start again, and wait at least a minute before requesting another. Repeated requests may require a longer wait.
- I cannot change my selections.
- A submitted gallery is read-only until Scarlette reopens it. Edits also pause briefly while the photographer organizes filenames. Follow the message on your gallery and try again when that finishes.
- The link no longer opens my gallery.
- The invitation may have expired, access may be paused, or the link may have been replaced. Ask Scarlette to check it or send a current link.
- A photo disappeared or its filename changed.
- The photographer may have refreshed the proofs or organized their names. Saved selections follow the photo's Drive file ID, so a filename change does not erase your choices. Removed photos do not count toward the current selection totals.
- I still need a hand.
- Email dupagephoto1@gmail.com or use the contact page.